The holiday season is all about adding that extra sparkle to everything – from the twinkling lights on your tree to the thoughtful gifts you give. And what better way to make your presents stand out than with personalized Christmas tags? Instead of using the same old store-bought tags, why not create something unique, festive, and truly your own? With just a few easy steps using Remove-BG a, you can design beautiful, custom tags that add a heartfelt touch to every gift.
In this guide, we’ll walk you through everything you need to know to make your own Christmas tags, from removing backgrounds for custom stickers and photos to designing your tags, festive templates. Let’s get started and make this holiday season even more merry with handmade gift tags.
Custom background-free stickers and photos for your handmade Christmas tags
Adding a personal touch to your Christmas tags can make your gifts unforgettable. By using Remove-BG.AI, you can easily remove backgrounds from your favorite images. It is a powerful, AI-driven tool that removes backgrounds from images in seconds.
This makes it easy to get a clean, background-free version of any photo that you can use to create custom stickers, tags, or any other DIY projects. Plus, it’s free to use, making it perfect for crafting on a budget.

Step 1: Automatically remove the image’s background with Remove-BG.AI
Remove-BG.AI makes background removal and customization incredibly simple and accessible, making it a go-to tool for anyone looking to enhance their images quickly and creatively.
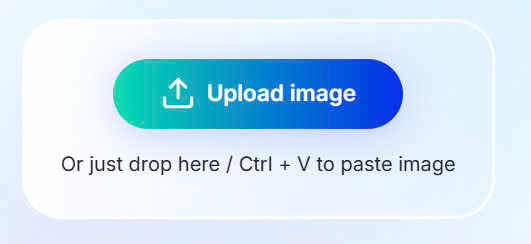
- Open your internet browser and navigate to the Remove-BG.AI homepage
- Click on “Upload Image” to open a file selection window on your device, and choose any photos you want. Or you can simply drag and drop it onto the designated area on the Remove-BG.ai homepage.
- Once your image is uploaded, the advanced AI will automatically detect any objects, foregrounds, and borders in just a few seconds.
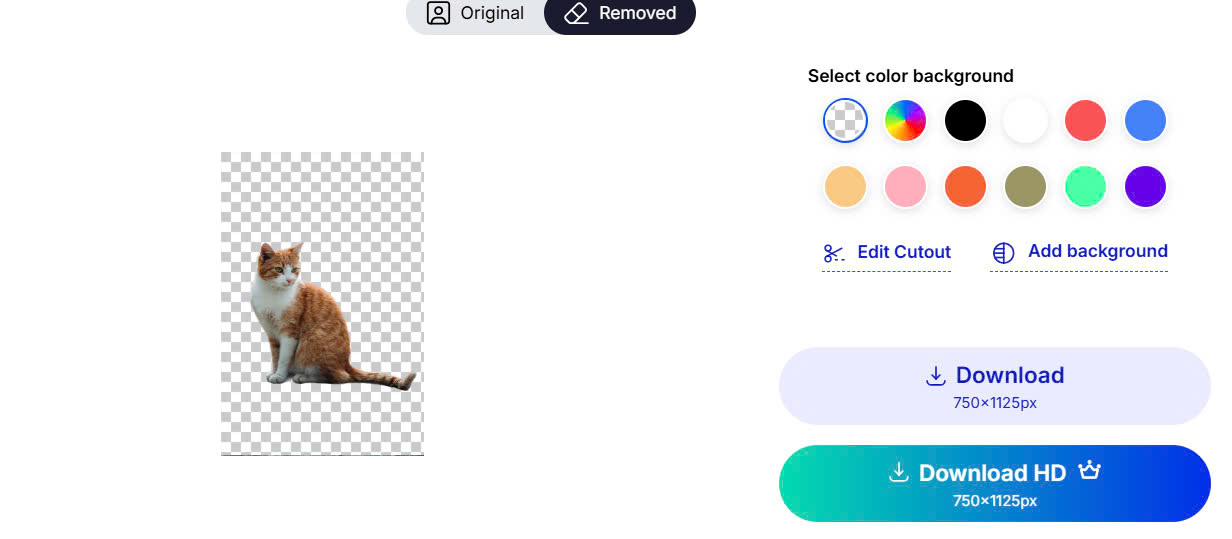
- After processing, you will see a preview of your image with a transparent background, which means the original background has been successfully removed.
Step 2: Refine the cutout image if needed
Check the preview to ensure the cutout looks clean and includes only the parts of the image you want. You can edit and refine the cutout image very easily
- Click the Edit Cutout button to modify the cutout to your liking. You can zoom in, erase any background, or restore any part with just a few clicks.
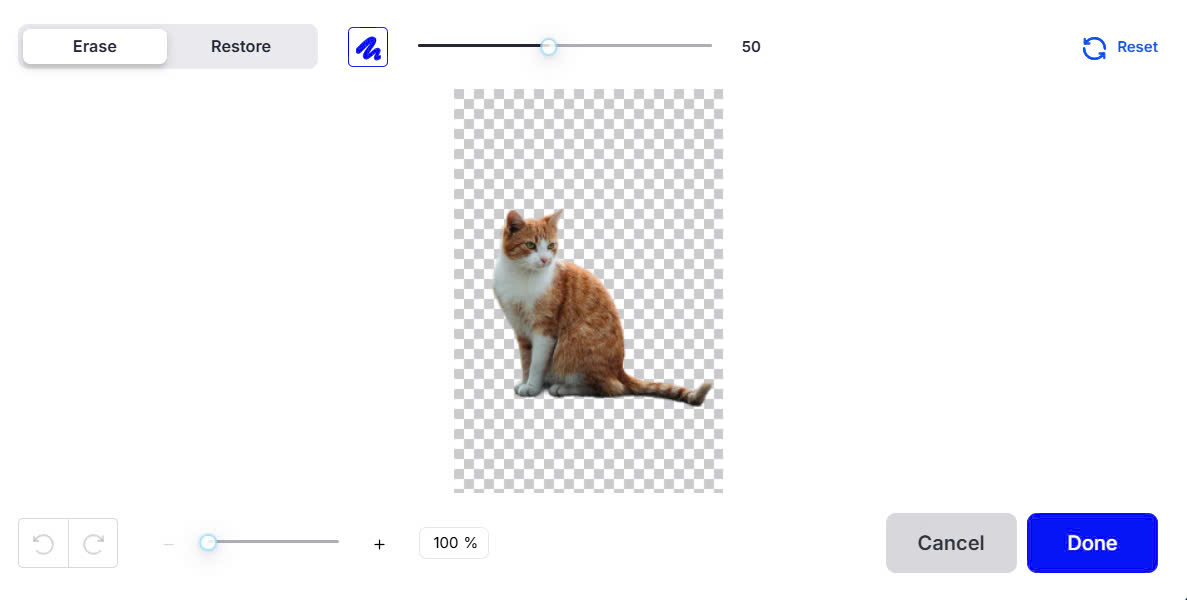
This may include fine-tuning the area around hair, objects, or other detailed sections of your image for a cleaner cut.
- After you’re satisfied with the result, click Done
Step 3: Change the background if you want
Remove-BG.AI cuts the image background out completely and efficiently. Now it’s time for the fun part: choosing a new background from the wide selection of pre-made backgrounds, and colors, or you can even upload your own background.
- If you want a simple color background, simply click on the color you like on the Select color background section. If you want more beautiful background, click Add background.
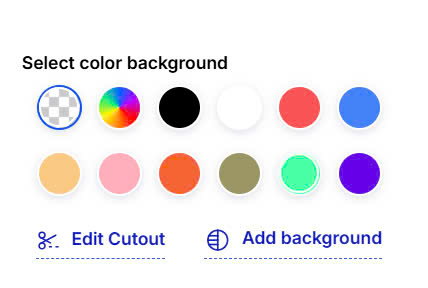
- Remove-BG.AI has more than 100 templates for you to freely choose from. There are many categories and theme, such as “Holiday,” “Nature,” “Cityscapes,” and “Patterns”, etc. You can upload your own background by clicking the Upload and import your photos.
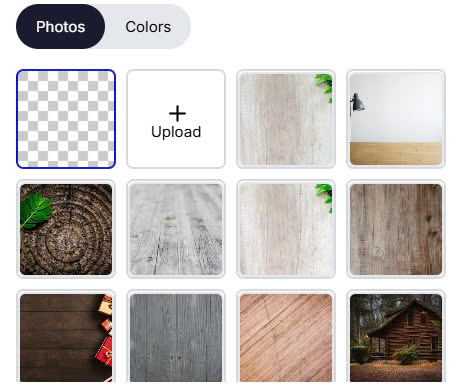
- Once you find a background you like, simply click on it. This will automatically apply the background to your image. Try a few different backgrounds if you’re unsure; the tool lets you preview each one instantly so you can compare options.
Learn more: How to add a Christmas background to a photo
Step 4: Download
After selecting the perfect background, it’s time to save your custom project.
- Once you’re happy with the result, click the “Download” button.
- You can choose different file formats and resolutions. The standard is 750×1125 pixel. You can also download it with HD quality.
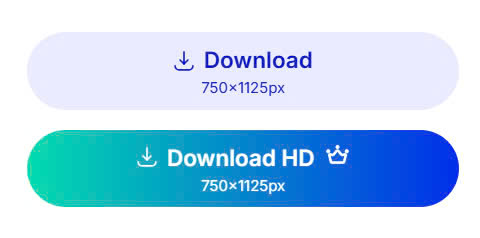
Now your custom photo, complete with its new background, is ready to be used to make your own Christmas gift tags or other creative projects. Remove-BG.AI is free for all users. You can pay a little extra to save the images to your devices in the highest possible quality.
Personalized gift tags easily with Remove-BG.AI
With Remove-BG.AI, a single click can make your image background-free in seconds. Its advance AI helps you remove backgrounds without spending hours in complex editing software. Remove-BG.AI is Ideal for creating custom stickers, product photos, profile images, and holiday designs. The transparent backgrounds allow for easy layering in any design setting.
As an online tool, Remove-BG.AI is accessible on any device (laptop, mobile phone, desktop, etc) with internet access, making it perfect for on-the-go edits. Since it’s a web-based tool, you don’t need to download or install any software, saving space on your devices and allowing instant access.
Moreover, images are processed securely, and no data is stored, ensuring your privacy for sensitive or personal photos.
Pro-tips for beautiful DIY Christmas tags
Here are some fun and useful tips for making your own DIY Christmas tags unique and stunning.
- Print multiple tags
If you’re printing multiple tags, you can copy and paste your design several times onto a new, larger canvas (such as a standard 8.5 x 11-inch document) to print multiple tags on a single sheet.
- Choose holiday-themed fonts and elements
Try using holiday-themed fonts available, like curly or handwritten styles, to give your tags a warm, festive feel. Choose classic holiday colors like red, green, gold, and silver, or try trendy pastel hues for a modern twist.
- Personalize with photos and stickers
Add family photos or custom images to each tag for a memorable touch. This works especially well for tags on gifts to loved ones. Create or upload custom stickers (like Christmas trees, ornaments, or even your pet) to give each tag personality.

- Incorporate hand-drawn elements
Add a personal touch with hand-drawn doodles, like snowflakes or holly berries, using a fine-tip pen or marker. For a digital look, try adding illustrations from selements library for instant holiday flair.
- Play with backgrounds and borders
Use Remove-BG.ai to create transparent backgrounds for photos and add them seamlessly onto a holiday-themed tag. Add a border to frame your text or images, giving your tags a polished, finished look.
- Make the tags reusable
Consider laminating your tags so they can be reused year after year. Just add a wipeable marker message that can be changed each holiday.
- Turn your designs into digital cards
After using Remove-BG.AI to remove the background or add festive scenes, you can easily transform your edited images into digital holiday cards. Simply add a holiday message, customize with seasonal colors, and add decorative elements in a design tool. You’ll have a personal, digital card ready to send instantly to family and friends. Perfect for spreading holiday cheer in a unique and eco-friendly way
Make the holiday merrier with Remove-BG.AI
Creating your own Christmas tags adds a wonderful personal touch to every gift you give this holiday season. By combining Remove-BG.ai’s seamless background remover and versatile design tools, you can make tags that capture the festive spirit and match your style perfectly. Whether you’re adding family photos, experimenting with holiday templates, or getting creative with colors and fonts, DIY tags allow you to bring a unique charm to your presents.
Gather your creativity, dive into these easy steps, and make each present under the tree stand out with a tag that’s as special as the gift itself. Happy crafting, and happy holidays.
Last updated by: admin on 02:00 - 28/06/2025


